Mastering How to Grow Cannabis at Home: A Complete Guide
August 20, 2026 15 min read 2,954 words
Cultivate your own high-quality cannabis safely and effectively, from seedling to harvest, with our expert advice.
Start Your Grow Today
Understanding the Legal Landscape of Home Cannabis Cultivation
 Photo: Terrance Barksdale / Pexels
Before you even think about purchasing your first seed, the absolute first step in learning how to grow cannabis at home is to understand the legal framework in your specific state and locality. Cannabis laws in the United States are a complex patchwork, varying significantly from one state to another, and even between counties or cities within the same state. While a growing number of states have legalized cannabis for medical or recreational use, the specifics of home cultivation – such as the number of plants allowed, whether outdoor growing is permitted, and specific security requirements – can differ dramatically. For instance, some states might allow up to six plants per adult, while others may limit it to twelve per household, or even prohibit home growing entirely. It's not uncommon for there to be distinctions between medical cardholders and recreational users regarding cultivation limits. Ignoring these laws can lead to severe penalties, including fines, confiscation of plants, and even criminal charges. Therefore, a thorough investigation of your local ordinances is non-negotiable. Websites like NORML (National Organization for the Reform of Marijuana Laws) or your state's official cannabis regulatory body are excellent resources for up-to-date information. Beyond plant count, consider regulations on visibility (e.g., plants not visible from public view), security (e.g., locked grow spaces to prevent access by minors), and even odor control, which can sometimes be a point of contention with neighbors. Some jurisdictions also have specific rules about where on your property you can grow, such as prohibiting cultivation within a certain distance of schools or playgrounds. Understanding these nuances will not only protect you legally but also help you plan your grow space effectively and discreetly. Remember, compliance is key to a stress-free home cultivation experience.
Learn more about cannabis regulations.
Setting Up Your Ideal Indoor Grow Environment for Cannabis
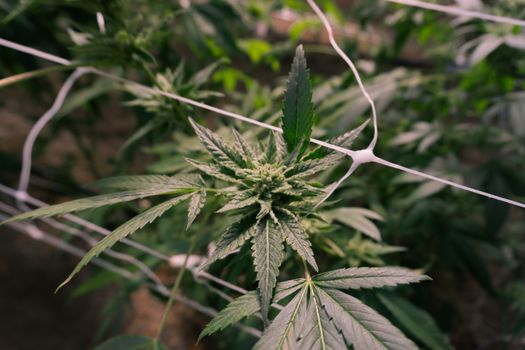 Photo: Haley Bee / Pexels
Once you've navigated the legalities, the next critical step in how to grow cannabis at home successfully is establishing an optimal indoor grow environment. This involves controlling several key factors: light, temperature, humidity, ventilation, and CO2. Each plays a vital role in the plant's growth and eventual yield.
**Lighting:** Cannabis plants require intense light to thrive. For indoor growing, popular options include High-Intensity Discharge (HID) lamps (Metal Halide for vegetative, High-Pressure Sodium for flowering), LED grow lights, and sometimes fluorescent lights for seedlings. LEDs are increasingly favored for their energy efficiency, lower heat output, and customizable spectrums. The amount of light, measured in Photosynthetic Photon Flux Density (PPFD), and the light cycle (e.g., 18/6 for vegetative, 12/12 for flowering) are crucial. Investing in a good quality grow light is perhaps the most significant equipment decision you'll make.
**Temperature and Humidity:** Cannabis plants have ideal temperature and humidity ranges that vary depending on their growth stage. During the vegetative stage, temperatures between 70-85°F (21-29°C) and relative humidity (RH) of 50-70% are generally preferred. In the flowering stage, slightly cooler temperatures (68-78°F / 20-26°C) and lower humidity (40-50% RH) are best to prevent mold and encourage resin production. Maintaining these conditions often requires thermostats, hygrometers, heaters, humidifiers, and dehumidifiers.
**Ventilation and Airflow:** Proper air circulation is paramount. An exhaust fan with a carbon filter is essential for removing stale air, controlling odors, and bringing in fresh CO2-rich air. Oscillating fans inside the grow space help strengthen plant stems and prevent stagnant air pockets, which can lead to mold and pest issues. The carbon filter is especially important for discretion, as flowering cannabis plants can produce a very strong aroma.
**Growing Medium:** You'll need to choose a medium to support your plants. Popular choices include soil, coco coir, or hydroponic systems. Each has its pros and cons regarding ease of use, nutrient delivery, and yield potential. Soil is forgiving for beginners, while coco coir offers a good balance of aeration and water retention. Hydroponics can yield faster growth and larger harvests but requires more technical expertise.
**Nutrients:** Cannabis plants are heavy feeders. They require a balanced diet of macro-nutrients (Nitrogen, Phosphorus, Potassium) and micro-nutrients throughout their life cycle. Specific nutrient formulations are available for vegetative and flowering stages. Over-feeding or under-feeding can lead to nutrient deficiencies or burn, so careful monitoring of pH and EC (electrical conductivity) levels is vital. pH levels in the growing medium directly impact nutrient uptake, typically aiming for 6.0-7.0 for soil and 5.5-6.5 for hydroponics/coco coir.
**Grow Tents vs. Dedicated Rooms:** For most home growers, a grow tent offers a contained, controlled environment that is relatively easy to set up and manage. They come in various sizes and are designed to be light-proof and reflective. For larger operations, a dedicated grow room might be necessary, allowing for more space and customizability. Regardless of your choice, ensuring a clean, pest-free environment from the start will save you headaches down the line. A well-planned and executed grow environment is the foundation for healthy plants and bountiful harvests when you learn how to grow cannabis at home.
The Cannabis Life Cycle: From Seed to Harvest and Beyond
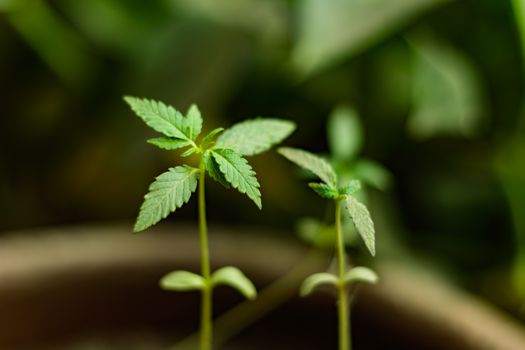 Photo: Mubinuddoula Arefin / Pexels
Mastering the life cycle of the cannabis plant is fundamental to understanding how to grow cannabis at home successfully. Each stage has unique requirements and challenges, and recognizing them is key to maximizing your yield and quality.
**1. Germination (3-10 days):** This is where life begins. You can germinate seeds using several methods: the paper towel method (seeds between damp paper towels in a plastic bag), direct planting in a light starter medium, or soaking in water for 12-24 hours until a taproot emerges. The goal is to get the seed to sprout a taproot, which will then grow downwards, while the shoot grows upwards. Maintain warmth and humidity during this delicate phase. Once the taproot is about a quarter-inch long, carefully transfer it to your chosen growing medium.
**2. Seedling Stage (2-3 weeks):** After germination, the plant emerges from the soil with its first round, cotyledon leaves, followed by the first set of true serrated leaves. Seedlings are fragile and require gentle care. They need moderate light (often 18-24 hours per day), high humidity (60-70% RH), and light nutrient feeding. Overwatering is a common mistake at this stage, so allow the top layer of your medium to dry out slightly between waterings. Focus on establishing a strong root system.
**3. Vegetative Stage (3-16 weeks):** This is the growth powerhouse stage, where the plant focuses on developing robust stems, branches, and leaves. The duration depends on the desired plant size and strain genetics. During this stage, plants require intense light (typically 18-24 hours per day), higher nitrogen nutrients, and consistent temperatures (70-85°F / 21-29°C) with moderate humidity (50-70% RH). This is also the time to implement training techniques like topping, FIMming, LST (Low Stress Training), or ScroG (Screen of Green) to shape your plants, encourage lateral growth, and optimize light penetration, ultimately leading to higher yields. Adequate airflow is crucial to prevent mold and strengthen stems.
Explore advanced training techniques.
**4. Flowering Stage (6-12 weeks):** This is the most anticipated stage, where your plants produce the coveted buds. For photoperiod strains, flowering is triggered by reducing the light cycle to 12 hours of light and 12 hours of uninterrupted darkness. Autoflowering strains will flower automatically regardless of the light cycle. During flowering, plants require higher phosphorus and potassium nutrients and lower nitrogen. Humidity should be reduced (40-50% RH) to prevent mold, especially as buds become dense. Monitor for pests and diseases diligently. The flowering stage is often divided into early, mid, and late flowering, with distinct changes in bud development and nutrient needs. Trichomes, the tiny resin glands on the buds, will change color from clear to cloudy to amber, indicating ripeness. Use a jeweler's loupe or microscope to observe these changes.
**5. Harvest (1-2 weeks):** Timing is everything for harvest. The ideal time is when most trichomes are cloudy with a small percentage turning amber, indicating peak THC levels. Harvesting too early results in less potent, more energetic effects, while harvesting too late can lead to a more sedating, couch-lock effect. Carefully cut down your plants, trim away large fan leaves, and prepare them for drying.
**6. Drying (5-10 days):** Proper drying is crucial for preserving terpenes and cannabinoids. Hang trimmed branches upside down in a dark room with good air circulation, temperatures around 60-70°F (15-21°C), and humidity around 50-60% RH. Buds should dry slowly and evenly until the smaller stems snap rather than bend.
**7. Curing (2-8+ weeks):** Curing is the final, often overlooked, step that significantly enhances the flavor, aroma, and smoothness of your cannabis. Place dried buds in airtight glass jars, filling them about ¾ full. Open the jars ('burp' them) for 15-30 minutes several times a day for the first week, then once a day for the subsequent weeks. This allows moisture to escape and prevents mold while facilitating the breakdown of chlorophyll and development of complex terpenes. A well-cured bud will provide a much more enjoyable experience. Each stage of the cannabis life cycle demands attention and care, but understanding these phases will empower you to cultivate high-quality cannabis right in your home.
Common Mistakes and Advanced Tips for Home Cannabis Growers
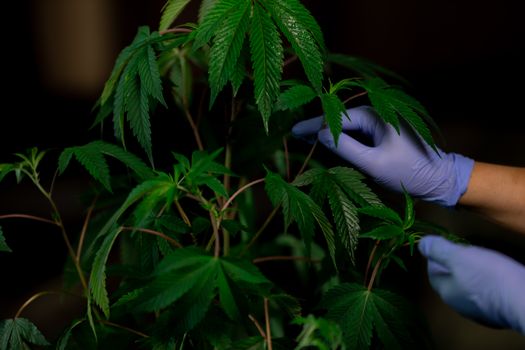 Photo: Kindel Media / Pexels
Even with the best intentions, new growers learning how to grow cannabis at home often encounter common pitfalls. Avoiding these can significantly improve your chances of success. Conversely, incorporating advanced techniques can elevate your cultivation skills and yield.
**Common Mistakes to Avoid:**
* **Overwatering:** This is perhaps the most frequent beginner error. Cannabis roots need oxygen, and constantly saturated soil suffocates them, leading to stunted growth, nutrient lockout, and root rot. Always let the top inch or two of your medium dry out before watering again. Lift your pots to feel their weight – a light pot needs water, a heavy one doesn't.
* **Incorrect pH:** The pH of your water and nutrient solution directly impacts nutrient availability. If the pH is too high or too low, your plants can't absorb essential nutrients, even if they're present in the medium. Invest in a reliable pH meter and adjust your water and feed to the appropriate range (typically 6.0-7.0 for soil, 5.5-6.5 for hydro/coco).
* **Nutrient Burn/Deficiency:** Over-feeding (nutrient burn) can scorch leaves, while under-feeding leads to deficiencies. Start with a lower dose than recommended on nutrient labels and gradually increase. Learn to read your plants – discolored leaves, stunted growth, or unusual patterns are often signs of nutrient issues.
* **Poor Air Circulation:** Stagnant air is a breeding ground for pests and mold. Ensure good airflow with oscillating fans and proper exhaust. This also helps strengthen stems.
* **Light Leaks during Flowering:** For photoperiod plants, even small amounts of light during the 12-hour dark cycle can stress plants, leading to hermaphroditism or reversion to the vegetative state. Ensure your grow space is completely light-proof.
* **Impatience with Harvest/Curing:** Harvesting too early or skipping the curing process significantly diminishes the quality, flavor, and potency of your buds. Patience is a virtue in cannabis cultivation.
**Advanced Tips for Maximizing Your Home Grow:**
* **Integrated Pest Management (IPM):** Proactively prevent pests by maintaining a clean grow space, inspecting plants regularly, and using beneficial insects or organic sprays as a first line of defense. Prevention is far easier than eradication.
* **CO2 Supplementation:** In a sealed grow room with adequate lighting, supplementing CO2 can significantly boost growth rates and yields. This is typically for more experienced growers with controlled environments.
* **Advanced Training Techniques:** Beyond basic topping, consider techniques like mainlining, super cropping, or defoliation (selective removal of leaves) to further optimize light penetration and bud development. These techniques require a good understanding of plant response.
* **Environmental Monitoring Systems:** For ultimate control, consider automated systems that monitor and adjust temperature, humidity, and even CO2 levels, ensuring a consistently ideal environment.
* **Pheno Hunting:** If you're growing from regular seeds, you might find variations within a single strain. 'Pheno hunting' involves identifying and cloning the best performing individual plants (phenotypes) for future grows, allowing you to consistently reproduce superior genetics.
* **Flushing:** Before harvest, many growers 'flush' their plants by feeding only plain, pH-balanced water for the last 1-2 weeks. This is believed to remove residual nutrients, leading to a smoother, cleaner smoke. While debated, many swear by its benefits.
By diligently avoiding common mistakes and gradually incorporating advanced techniques, you can transform your journey of how to grow cannabis at home from a simple hobby into a highly rewarding and productive endeavor.
